Showing posts with label Photoshop. Show all posts

Free GIF Animator Software To Creat And Edit Animated GIFS

Cyotek Gif Animator beta, is a free gif animator software. Using it you can create, edit, and save animated gifs. It is powerful gif animator software that lets you extract frames, edit each single frame, flip frames, optimize frame colours for reducing gif size, add more new frames and fill them with new images, change animation dimensions and image offsets, control the looping, duplicate frames, rearrange frames, delete frames, and do lot more.

The freeware supports a huge set file formats. The major ones includes: JPG, BMP, TIFF, PNG, ICO, JNG, PBM, RAS, TGA, PSD, JP2, and lot more. The freeware can also nicely integrate with other image editing software, installed in your PC, and helps you create professional looking animated gifs.
Create-edit animated gif using this free Gif animator software:

The freeware is still in its beta version, and is free only in beta version. It is a lightweight software and doesn’t contain any 3rd party adware. Installation is just like installing a usual software. It has got an easy to use interface, all the buttons and menus are pretty self-explanatory.

On launching the software, you’ll get an interface that tells lot about the freeware. The whole software is divided into two panes; covering most of the interface, and buttons, menus at the top. One of the pane is for the frames of the animated gif, and the other is for changing the attributes of animation like: loop number, animation dimensions, image offset, frame speed etc. Either create a new animated Gif using images, from the scratch or, open a pre-existing animated gif using the New and Open tools.
On opening a pre-existing gif, the software automatically extracts each single frame. You can edit each single frame, using the tool bar tools. Or you can simply export a frame into another Photo editing software installed in your PC. Simply right-click on the desired frame, you’ll get a context menu, choose Edit image option. Using this same context menu you can export a frame and save it to any of the mentioned file formats. Besides that you can add frame, replace image, duplicate image, delete frame, move frame up or down etc.
The optimize feature, is a handy feature of freeware. It lets you reduce the frame size, and ultimately the whole animation size. Using it you can lower the colour count of the frame or desaturate it. One more similar feature of this freeware is: you can view and define a new global palette for all the frames of the gif. This also has similar effect as that of Optimize feature. To do that use the Create Global Palette option under Project menu.
There are other more good features for advanced users. You can alter the freeware settings using the Options feature under Tools menu. Use this Options feature to enable save backups, automatically open with last opened document, assign custom photo editor etc.
Once done with everything, you can preview the animation by clicking on respective button at the interface, before exporting file as an animated Gif file.

Key features of this free Gif animator software:
  • Completely free.
  • Create, edit, and save animated gifs.
  • Extract frames, and edit each single frame.
  • Add new photo frames, delete, duplicate, rearrange frames.
  • Change animation speed, dimensions, loops etc.
  • Lightweight.
  • Easy to use interface.
Get Cyotek Gif Animator beta here.
Continue Reading

How To Use Photoshop Filters In Paint.Net

This tutorial explains how to use Photoshop filters in Paint.NET.

Natively, Paint.NET doesn’t support feature to apply Photoshop filters to enhance photos. However, there is a fantastic Paint.NET plugin, called Paint.NET 8bf filter plugin, which can host Adobe PhotoShop compatible filters (*.8bf files) to apply them on images. With this plugin, Paint.NET becomes an even more powerful image editor. You don’t need to use PhotoShop if you especially use it for applying the stunning filters in photos.

In the screenshot below, you can see the window of this plugin where it shows Photoshop filters and the option to Run the selected filter.
Now let’s see how you can use Photoshop filters in Paint.NET.

Install Paint.NET 8bf filter plugin to use Photoshop Filters in Paint.NET:

Use the steps mentioned below to install this plugin and use Photoshop filters:

Step 1: Using this link, you can download the zip archive of this plugin.
Step 2: Extract that archive and you will find PSFilterPdn.dll and PSFilterShim files. Copy those files and paste them in Effects folder of Paint.NET’s installation directory.
Step 3: You also need to copy and paste your Photoshop filter files (8bf) to the same directory. If you don’t have any, then of course you need to download those files first.
Step 4: Launch Paint.NET and add an image. After this, click on Effects menu. You will find 8bf Filter… option. Click on that option and window of Paint.NET 8bf filter plugin will open.
Step 5: Filters tab will show the list of all added filters. You can select any filter and click on Run Filter button. It will launch that particular filter.
That’s it, guys! Now you can show your skills to use the filter and turn the photo into a beautiful masterpiece.

Get Paint.NET 8bf filter plugin for free. Here

This tutorial explains how to make mosaic in Paint.NET.
Continue Reading

Powerful And Feature Loaded Image Editing Software: PIXLR

Pixlr is an incredibly powerful and feature loaded free image editing software. Simple and intuitive, this beast of an application lets you fine tune your digital images to the absolute maximum, thanks to the truckload of tools that it comes built-in with. Pixlr consists all of the standard image editing features (auto adjust, crop/resize, exposure control, red-eye reduction), and then some more. Apart from that, it can prettify your images using a large variety of filters, overlay masks, borders, stickers, and a whole lot of other goodies. You can also add text to your images. Pixlr is a lightweight application, and supports all common image formats (JPG, PNG, GIF, BMP and even PSD). Pixlr has been available as a web based app for quite a while. So how exactly is the desktop version of this thing? Time to find out!

Pixlr: Installation And Primary User Interface

Installing Pixlr is a fairly routine affair, akin to installing any other software application. All you have to do is download the software, and install it. Here’s how Pixlr’s primary user interface looks like:
As illustrated by the above screenshot, Pixlr has an easy to use and straightforward interface. Majority of the UI just consists of the preview area, where the images to be edited show up. All of the primary editing options sit on the left, stacked in the form of a vertical bar. Clicking each option reveals further sub-options (e.g. The Fast option includes standard editing features like resize, auto-contrast, and more). Some of these expand further to reveal even more options. There’s also a simple menu bar up top that can be used to access (most) of the editing options in a bit more standard way. A status bar, having usual social sharing options and some other stuff sits at the bottom, completing the user interface. Pretty standard stuff!

How To Jazz Up Your Images With Pixlr Image Editing Software?

Using Pixlr to edit your images and add amazing effects to them is ridiculously easy. All you have to do is load up the image you want to edit, make your modification(s) and save the changes. Though it’s not possible to discuss each and every feature available in Pixlr due to the sheer number, but they’re all the same essentially. Here’s a little step by step process anyway, to get you started with this amazing image editing application.

Step 1: Load the image that you want to edit in Pixlr using File > Open. A preview of the image is rendered in the preview area as soon as it’s loaded.

Step 2: Now, the next step is obviously to make the changes to the images. To do so, select one of the primary options, and then select a sub-option. For example, you can click on refine, and then choose from one of the options: color, contrast, blur, sharpen, smooth or double exposure. Once selected, you can also fine tune the way the editing operation is applied via sliders. Check out the screenshot below:
As illustrated by the above screenshot, the applied editing effects are rendered to the image preview in real-time, so that you can easily see how the image will look after editing. Pretty awesome, right?

Step 3: That’s all there’s to it! Once you’ve made all the changes that you want to the image, simply use the Save as option from the File menu to commit the changes. Simple as pie!

Pixlr: Summary Of Features

The editing features available in Pixlr are organized into categories for easy navigation. These are briefly summarized below:
  • Fast: Consists of standard editing operations such as crop, straighten, resize, auto-fix, heal, red-eye correction, focal, and more.
  • Refine: Has options to tinker with color, contrast, exposure etc.
  • Effect: Apply a variety of cool color filters to give a whole new touch to your images.
  • Overlay: Choose from a handy selection of overlays such as bokeh, color, and more.
  • Border: Add awesome looking borders/frames to your images.
  • Stylize: Add effects like dapple, cross-hatching, sketch etc.
  • Stickers: Make your images stand out by adding stickers and tattoos.
  • Type: Make your pictures say even more by adding text to them.
Get Pixlr for Desktop Here.
Continue Reading

Best Free Image And Photo Editing Software: PAINT.NET

Paint.NET is free image and photo editing software. It has a simple, intuitive, and innovative user interface; yet provides most of the advanced functions available in expensive image editing software. This makes it the best powerful yet simple image and photo editor tool.
I personally use this software a lot (to create most of the images for this website), and just love it. Apart from the fact that it is a completely free image editing tool, here are some of the features that I like most about it:

Unlimited Undo:
I am not an advanced user, so keep on making lots of mistakes in my edits. Paint.net provides unlimited undo, and  redo. So, no matter what mess I create, I can always revert it back to any step of my image editing.

Simple and Intuitive Interface:
The interface is really easy to use. It provides a tabbed document display, and provides a live thumbnail of all the images. All other functionalities are well placed, and can be easily found.

Layers:
It provides options to create rich layers, something available only in expensive image editors.

Special Effects:
It provides lot of options for special effects, including, blurring, sharpening, red-eye removal, distortion, noise, and embossing are included. Also provides unique 3D Rotate/Zoom effect that makes it very easy to add perspective and tilting. It also lets you tweak an image’s brightness, contrast, hue, saturation, curves, and levels.

Powerful Tools:
It provides some really powerful tools for creating shapes, Gradient Tool, Magic wand for selecting regions of similar color, and the Clone Stamp for copying or erasing portions of an image.

All these features make it the Best Free Image Editor.

Download Paint.Net Free: Download
Continue Reading

Websites To Crop GIF Images Free

These free websites let you crop the animated GIF images without changing them to still GIF format. So, when you want to extract only a particular part of your GIF, use that part as avatar, or just need to cut a particular portion of GIF image for sharing, these websites are handy.

Apart from cropping the GIF images, most of these websites are also useful to edit other format images, resize the GIF, etc. Let’s have a look at these free websites.


Freeware GIF Resizer (or GIFResizer) is also handy to crop your animated GIF as well as resize it. It lets you preview the output GIF before downloading to PC. After uploading the GIF, it provides an option to crop the GIF or set height and width to resize it.

Another interesting feature available here is that you can download a zip archive to get all the frames of your animated GIF. Frames are downloaded as PNG image. This website is really simple yet handy to crop the GIF, resize, and extract frames.

Watermark.ws is the best website in this list to crop GIF images and perform editing in GIF images. You will be able to rotate your GIF image,  crop, resize, and flip it. Apart from this, it comes with a feature to add text watermark to your GIF image. You can also choose any available font, set its opacity, size, rotation, and position. Moreover, you can also add a logo on your GIF image that can be used as an image watermark. Opacity, scaling, and rotation can also be adjusted by you for image watermark.

This handy website also lets you compress your GIF image to reduce its size. You can also change its color to Grayscale or Sepia. So, a lot of interesting features are available in this website that you can apply on your animated GIF. You can also upload other supported format images and edit those images.

To use this website, you need to create a free account. After this, it provides 10 MB storage space in this free subscription to upload images and edit them. When you are running out of storage space, you can also delete any uploaded image.

GIFmagic is one of the best website in this list and is specially designed to process animated GIFs. Apart from cropping the GIF image, you can also add comment to it and set number of loops. So if your GIF is in endless looping mode, you can set it to loop up to a definite interval.

This website also lets you resize your GIF, rotate it, flip it, and make it transparent. So, a lot of options are available to edit your animated GIF. However, during my testing, some of its features didn’t work, like it failed to add transparency, flip the GIF, etc. Still, it can easily crop your GIF, and add other changes with its handy features. Uploaded GIF remains for 3 hours on servers.

Online Image Editor (OIE) is a great website to crop animated GIF available on your PC or available online. You can also preview the cropped GIF before saving it to PC, which makes it more interesting. Apart from cropping the animated GIFs, you can resize it, add text to it, rotate, flip, add border, and more. So, it is an all in one solution to edit your animated GIF images.

Apart from editing the GIFs, you can also optimize your GIF to reduce the size of it. It can also split frames of GIF image and lets you remove unwanted frames from GIF.

After uploading a GIF image, you need to access Basics and Wizards tabs available in this website to edit your GIF image.


This is the last website in this list and handy to crop animated GIF. You can also use it convert GIF to JPG and PNG format. You can also edit your GIF to change it to greyscale, set height n width, add frame (if possible), make it blur, etc. So apart from the main task, it can be used to perform some basic editing to your GIF.

You can also use this website to crop and resize other format images. So, it is not limited to process animated GIFs only. Your input image is also deleted automatically, so you don’t have to worry about the original image.


*You can choose any of these and crop your animated GIFs.
Continue Reading

A SHOWCASE OF ANIMALS IN LOGO DESIGN

Creating a logo that perfectly suits a particular company or brand’s personality can be extremely challenging – and it’s perhaps even harder when the logo needs to include, or show off, a character or mascot. Designing a logo around an animal can be extremely difficult, but it can also be rewarding when you get it just right. That logo can match the personality of the brand and stand out from the regular, more traditional brand logos. We have selected a showcase of animals in logo design to help inspire you for your next brand design.


Are there any logos that you think deserve a mention? Let us know in the comments.


Continue Reading

Speed Up Photoshop by Moving Scratch Disk

One can speed up Photoshop by moving the scratch disk to some other partition which has more free space. It can be some other drive, other than your boot drive. It’s recommended to set Scratch disk in a drive which is not your boot drive (the drive in which operating system is installed).

In simple terms, scratch disk is like a virtual memory and this is used when physical memory (RAM) is full. For best results always set your Photoshop scratch disk which are fast drives, whether internal or external.

To move/change scratch disk open Photoshop and go to Edit > Preferences > Performance


In this screenshot, D: is selected, as C: is the system drive and also free space is very less in it. Therefore D: is selected which has more free space. You can also select more than one drive and arrange it in priority as per your wish. Just select it and click on that small arrow button. Finally click on OK and then settings will be applied upon restart.

Another small tip, notice the Memory Usage section. You can even increase that to improve the performance. E.g. in this screenshot it is 977 MB. You can change that to 1200 MB also.

So that’s it. Go ahead and improve the performance of Photoshop.
 Source: technostarry
Continue Reading

Desktop Photo Frame to See Photo Slideshow on Desktop

Desktop Photo Frame is a free software to see photo slideshow on desktop. Desktop Photo Frame shows the photo slideshow in a nice photo frame. You can choose the photo frame that you want to show on desktop, specify the folder in which your photos are stored, and Desktop Photo Frame will show those photos in a nice looking photo frame on your desktop.

Here are the steps to see Photo slideshow on your computer:

  1. Download Desktop Photo Frame. It is just a 6 MB download, and is available here. Run the executable to install it.
  2. In the program window, you start by choosing a frame for your photos. There are 25 frames available in this, and you can choose the one that you like.
  3. After that, you can specify the folder that contains your photos. You can specify the duration after which photos should change in slideshow. If you want, you can also choose to show just a single photo in your photo frame.
Then you are all set. Desktop Photo Frame will show photo slideshow on your computer. It’s that simple.
Source: I♥FreeSoftware
Continue Reading

Adobe Lightroom 3.4 RC Is Available for Download

Adobe lab have released the version 3.4 RC of Lightroom, which is code for a completely free copy of the latest Adobe Lightroom. The RC, which can be downloaded from Adobe Labs now, brings a host of bug fixes to Lightroom 3.3.

Features:
  • Lightroom encountered issues presenting double-byte character metadata after the image was edited on Photoshop.com.
  • Publish collections did not work properly if the sort order is set to descending. (“Z to A”).
  • Using the up/down arrow keys or the mouse wheel to adjust a parameter while the graduated filter is activated caused increments of plus or minus 100 instead of 1.
  • Interlacing artifacts, and a slight magenta cast in the deepest shadows could have appeared on some high-contrast edges of Canon mRaw files.
  • A magenta color cast could have appeared on Nikon D7000 images if the multi-exposure feature was used with raw capture.
  • Video files were allowed to be added to a SmugMug publish collection not capable of supporting video uploads.
  • Folder creation caused an expanded folder hierarchy to close unexpectedly in the Library Module.
New Cameras support in version 3.4:
  • Canon EOS 600D (Rebel T3i / Kiss X5)
  • Canon EOS 1100D (Rebel T3 / Kiss X50)
  • Hasselblad H4D-40
  • Olympus E-PL1s
  • Olympus E-PL2
  • Olympus XZ-1
  • Samsung NX11
Adobe is currently offering Photoshop Lightroom 3.4 RC as a free download. The release candidate will expire on 5/31/2011.


Download Adobe Lightroom 3.4 RC.

Continue Reading

6 Photoshop Time Savers for Web Designers

If you’re a web designer, you’ve probably fired up Photoshop once or twice (or ten thousand times). Saving time in your workflow should always be a goal because time is money, right? Check out these 6 great tips for saving time in Photoshop and start churning out projects more efficiently. 

Time is money right? When it comes to a new web design project, Photoshop generally comes into play at two stages. First, a lot of us use Photoshop to produce an initial site concept, maybe even several pages within a single site for a more robust concept piece. The second part is when we re-visit an accepted concept to continue building out individual site elements, slice up components and pull all kinds of visuals into our now HTML and CSS product. Getting through these stages quicker and more efficiently saves us time and allows designers to make more money by getting through projects efficiently.

Having done more site concepts than I would like to count I have been able to streamline my process and use some shortcuts that save me a lot of time. This skill set becomes one of necessity when you start to revisit your Photoshop files for current or past projects. Regardless of how well you may feel you have executed a design or a build out it is impossible to predict the mind of a client. Preparing yourself and your files for changes and frequent re-visits should be a routine practice for anyone who is working on the web. Here are just a few of the measures I take to ensure my projects keep moving smoothly.


1. Organize Early but Not Often

We all know that it is important to organize our Photoshop files. This means naming layers, using groups, and putting our layers in a meaningful order. Some may preach to organize early and often but I found that to be more of a hindrance than a help. I never waste my time naming or grouping layers when I create them because there is a pretty good chance I am going to decide not to use that layer when I become unhappy with the work.

Instead of constantly keeping on top of your layers and groups while you are in the middle of designing, take the time to organize everything before you close the project out or take a break. This will avoid distraction while you are in the middle of a design hot streak and keep you from wasting time over-organizing early on. Generally when I get to a point where I have executed all of my ideas or I need to stop on a project I save the file then go back and name and structure all of my layers and resave. This way the makeup of your messy layers is still fresh in your head.


2. Mask Image Groups

One of the most common and time consuming tasks I have on almost every project I do is cropping and framing additional images for a site. Often times I incorporate an area in my design for an image or several images that hold a similar place and the same style across different pages. Since we want new images on different pages going back and cropping, sizing, and styling these images can become a real pain. This rings especially true if you want to treat your images with a detailed border, shadow or other visual effect.

To avoid this routine in your project, simply keep a folder of the images that belong in this area of your project. Use a mask on this folder to ensure that all of your images are cropped the same. Use layers above and below the folder to apply borders or styles. Now all you need to do with your new images is drop them into the folder and drag them around until you are happy with the placement of the image subject. All of your sizing and styling is instantly taken care of. When it comes time to take the images online you can crop your canvas to the desired area and just start checking off layer visibility as you save away!


3. Recycle

No doubt you have been told about all of the things that you can do with your unused designs. Some say sell them off as templates, others say hang on to them and see if the work applies to another client down the road. Personally I dislike using a previous design for a new client, coming into a project with an existing design in mind is not the best way to provide your client with the best solution for them. However, this doesn’t mean you can’t still take advantage of work that you have done in the past.

Maybe you spent a lot of time on a detailed sidebar as a part of a design that you were really into but your client didn’t like. Now you have this entire design sitting around and we are hesitant to re-use the project as a whole. If we loved the detail work done on that old sidebar we can always pull it into a new project and make a few tweaks to make it blend beautifully with a new site. Just a few small changes to a group of layers can go a long way in providing a new look that hasn’t been done before while saving you all the time of starting from scratch all along.

Organizing your page elements into meaningful groups plays a huge role here. If I have two well organized Photoshop files I can simply move a group from one file into another and I have transferred a few hours of work instantly.

4. Use a Grid

Take advantage of grid systems early on as you build with Photoshop. I tend to use the 12 column 960 grid system for most of my design work but there is no right or wrong layout to use. Even if the final product is not going to be using the grid system CSS, starting with the same dimensions for most of my projects saves me a lot of time as I build them out later and allows me to quickly and easily re-use design elements like I mentioned earlier.

Pulling groups of layers from one file to another becomes dramatically easier when the given space between the two different designs is the same. Also the similarities in size and spacing will make your slicing and coding routine much smoother.


5. Stick with Styles

Layer styles are a great thing. They give us a pretty good level of flexibility with our layers and eliminate the need to produce additional layers in order to gain effects like shadows and gradients. Whenever I want to produce a particular look that I envision on a layer I try to get as far as I can with layer styles. This can greatly reduce the number of extra layers you have at the end of your project and it makes your style easy to copy over a wider array of page elements.


6. Know your Shortcuts

This one should be a given to anyone who uses Photoshop on a regular basis but knowing your key commands for common tasks is probably the biggest time saver of them all. It can be hard to teach an old dog new tricks, so I know that some of the people who read this will have been using Photoshop for years but are only taking advantage of a few key shortcuts.

Forcing yourself into the habit of using keyboard shortcuts after you have been clicking buttons and menus manually for several years can be a painstaking task and will no doubt slow you down for a little while as you build new habits. However, in the long run being able to navigate through the software with greater ease will pay off huge dividends not only in terms of time spent but also in how much easier it is to maintain a creative flow.


Photoshop Keyboard Shortcuts Cheat Sheet

What are your Techniques?

What tips and tricks can you share to speed along work in Photoshop? Examining how other people approach software will always reveal some fun and interesting things!

Continue Reading

Create a Mysterious, Dark Horror Scene with Crack Brushset in Photoshop

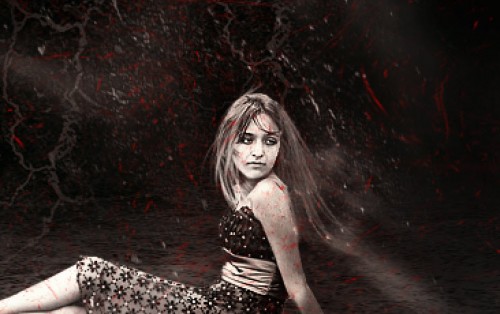
In this tutorial, I will show you the process I took to create this Mysterious, Dark Horror Scene with Crack Brushset in Photoshop. This is an intermediate level tutorial so some steps can be tricky,  but why not have a try!

Here is a preview of the final effect I have for this tutorial: (click to enlarge)

OK let’s get started!

To complete this tutorial, you will need to the following stock:
 Crack Brushset
Model – ~stox-and-bunz
Space Brush

Step 1

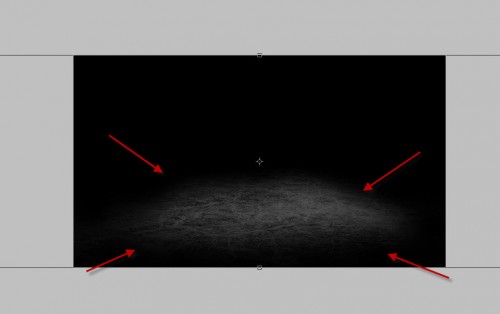
Create a new document sized 1400px * 800px, fill the background with black colour. Load the Crack brushes in Photoshop and paint some crack texture on a new layer, and erase the edges with a soft eraser:

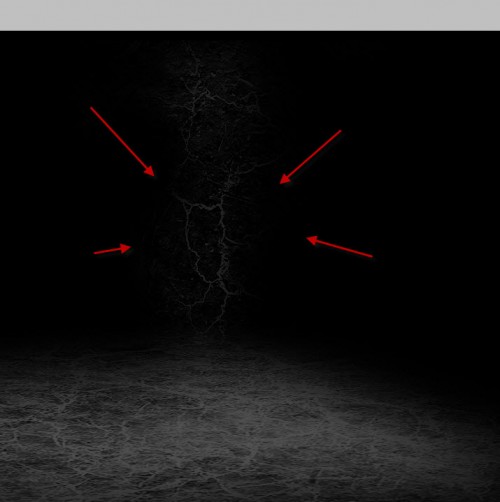
Create a new layer and once more paint some crack texture, erase the edges until you produce something as shown below:

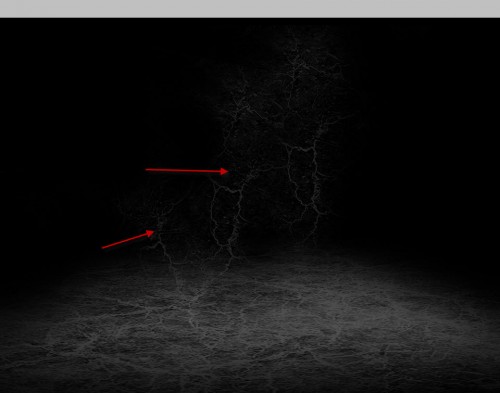
Duplicate this layer twice and move them to the position shown below:

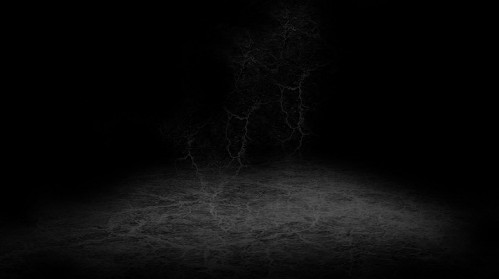
and here is the effect so far:


Step 2

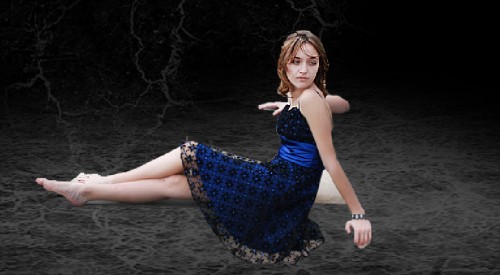
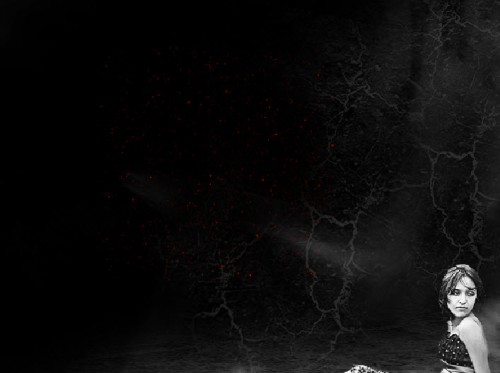
Load the model image into Photoshop, cut out the girl and paste it onto our document: (Resize it to fit our canvas size)
Erase the edges and the right arm with a soft brush:

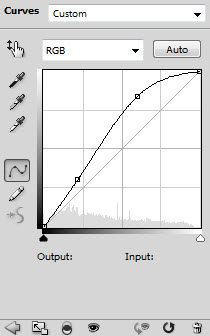
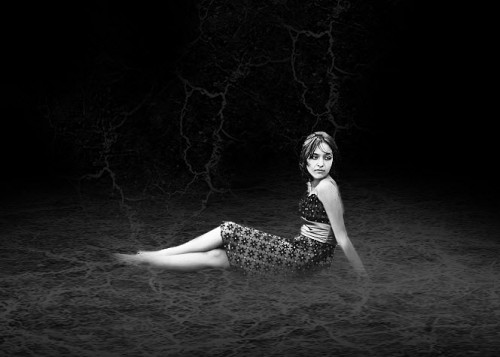
Add the following adjustment layers to the girl via clipping mask:
Black and White
Curves

and here is the effect so far:

Step 3

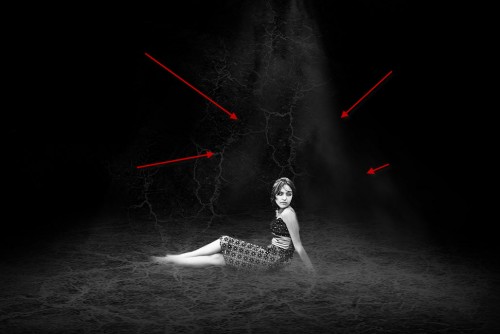
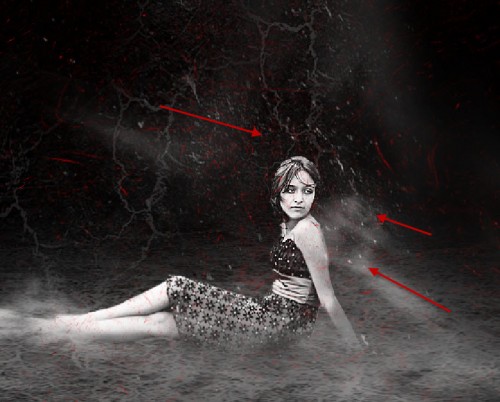
Now we’re going to render some cloud around the girl and the crack wall. You can either use the cloud filter or use cloud brush to achieve this effect.
Add some cloud on the top cracked wall, erase the edges as shown below:

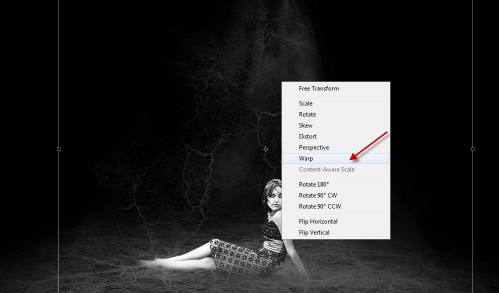
When you render cloud, make sure you utilise the free transform tool (distort, warp) functions to alter its shape.
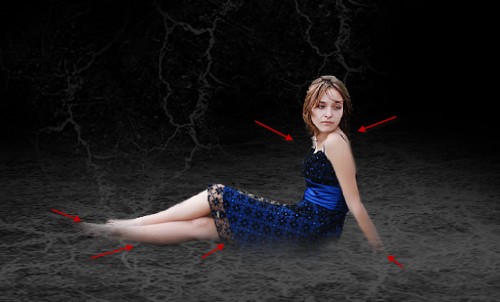
Also add some cloud overlay to the following area:

Cracked Floor

Over the shoulder:
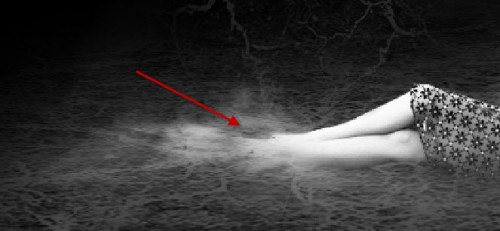
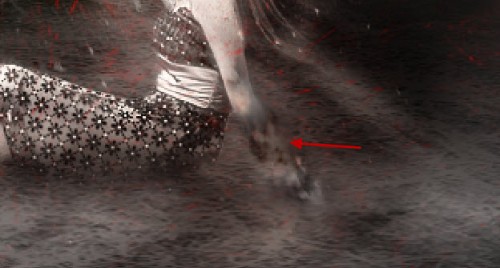
Feet area:

Hint: make use of layer blending mode and opacity for better outcomes.
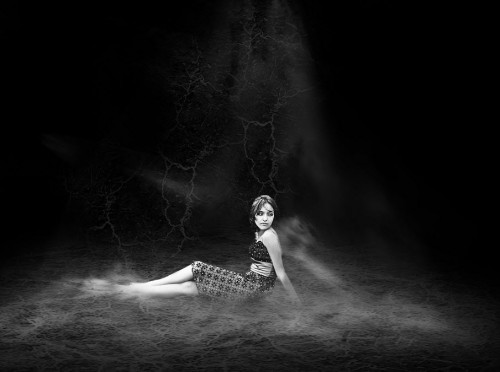
and here is the effect so far:

Step 4

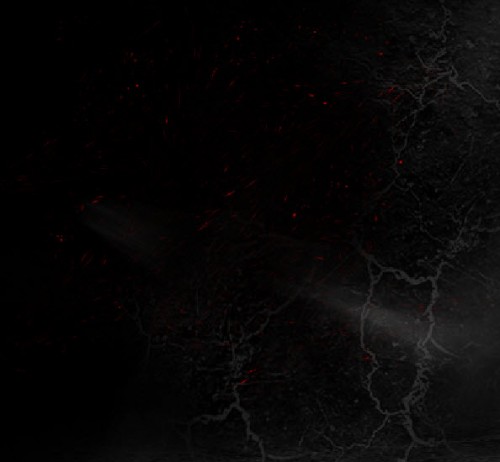
Now let’s add some red blood particles into the image. We can use the space brush we downloaded, paint an area as shown below:
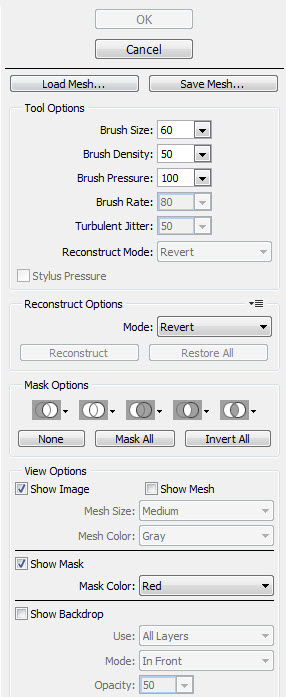
Then use the liquify filter (forward warp tool) with the following setting on those particles you just painted:
and here is the effect after the liquify filter:
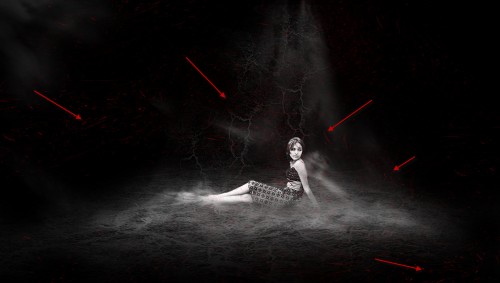
Duplicate this layer a few times, and place them around the canvas. Of course you can resize and distort those duplicated layer if you wish.
Optional: You can also use white colour and repeat the step above to add some particles around the girl’s upper body:

Step 5

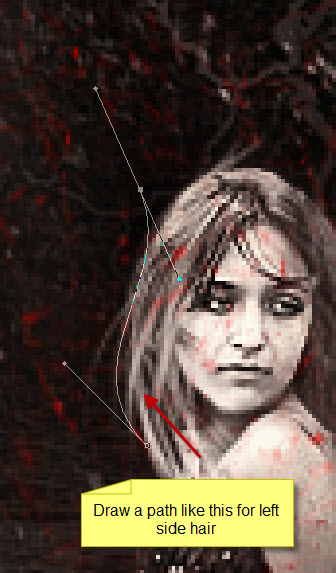
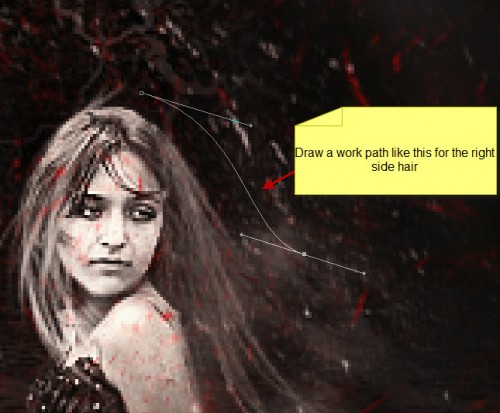
I decided to add some vexel hair on the girl. I won’t be going through the detail in this tutorial
One thing I would like to point out is:  when you draw the work path, make sure you following the shape of the girl’s face:
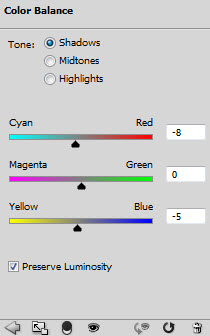
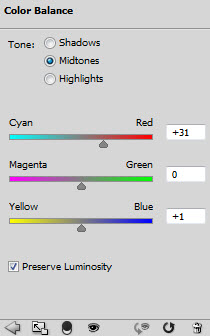
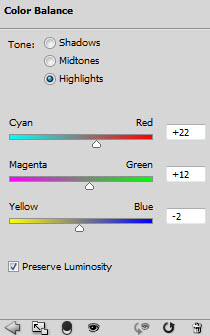
Add the following two adjustment layers on top of all previous layers created:


Mask on colour balance adjustment layer:
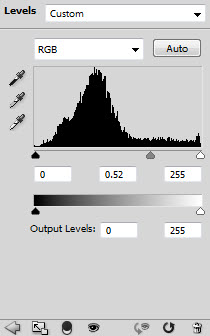
Levels:
Mask on Levels adjustment layer:
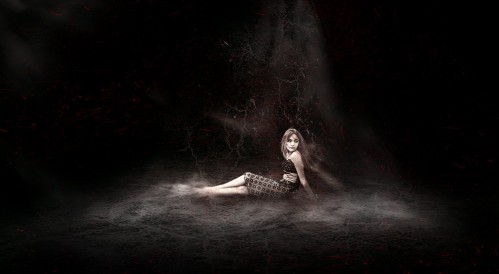
Here is the effect so far:

Step 6

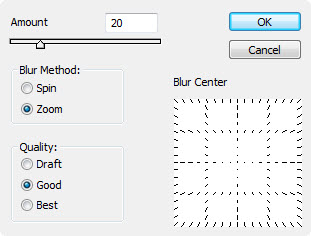
We’re almost done. For some final touchups, you can flatten the image, duplicate the background layer and apply the following radial blur filter to it:
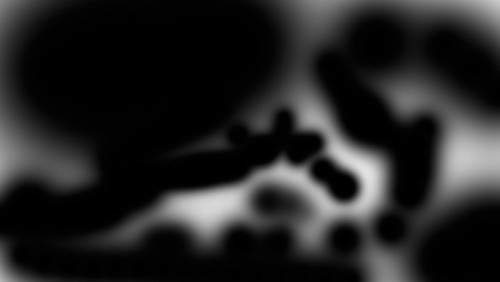
Of course we don’t want the whole image to be blurred, so add a layer mask on it:
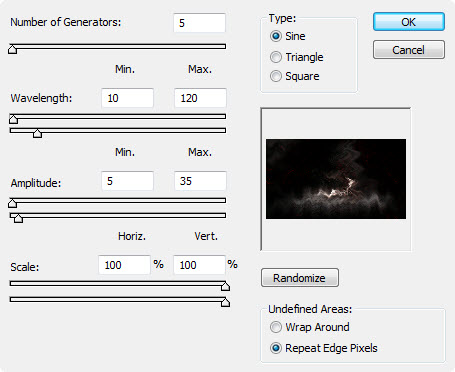
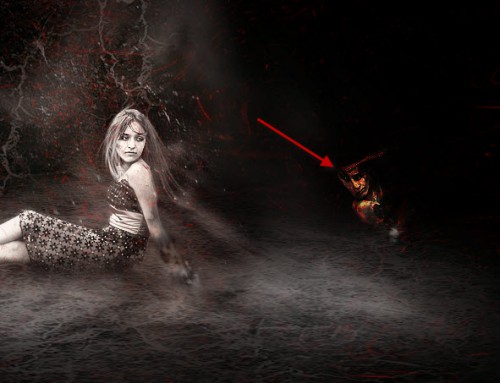
We can also create a ghost figure by using Wave Distort on a duplicated background layer:
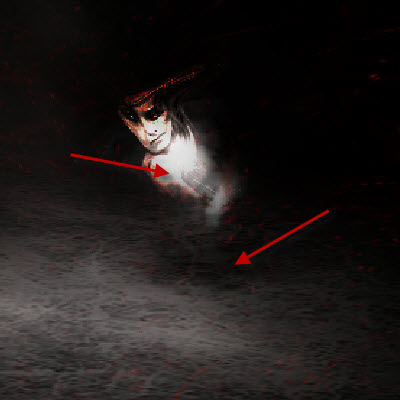
Erase the majority of this distorted layer and leave only the head portion, flip this layer horizontally and change its blending mode to “vivid light”:

Paint some lights and shadows underneath the distorted figure:
We can also produce some sort of vanishing effect for this girl’s area by having some cloud over it: 
Then change the blending mode to “color burn” for this cloud layer:
and here is the final effect: (click to enlarge)
That’s it! I hope you enjoy this tutorial and find it useful! Till next time, have a great day!
Source : www.psdvault.com
Continue Reading